User:Jessietail/Sandbox
Here are WIP pages I don't want to create articles for yet.
LRR gameplay
PS1 Scenery
The following is a list of Scenery Objects in the PS1 Game. These Objects serve little purpose and have few functions, if any.
Pillars
Pillars are tall towers of stone or ice that appeared only in the PS1 Game. Pillars serve no actual purpose in the game, nor pose any threat; they are there merley for decoration. The three cavern types have three seperate pillar models.
- Rock Pillar.png
The Pillar from the Rock environment
- Ice Pillar.png
The Pillar from the Ice environment
- Lava Pillar.png
The Pillar from the Lava environment
Crates
Crates are scenery Objects in the PS1 Game. They serve no real purpose in the game. A Vehicle can be used to move them around. Crates are invincible, and do not sink into Water or Lava.
Camera
The Camera is the point of view for the player in the Rock Raiders PC Game.
Camera Modes
There are three different camera modes in the game by default.
Top View
Top View is the camera mode the game is set to by default at the beginning of every Level. In this mode, the camera can typically move around using the Mouse, and Rotated using the Arrow Keys, and Zoom In & Out using the - and + keys. You can also drag the camera's position around on the Radar, where its indicated as a large rectangle with an arrow inside. If you target an object in the Radar, you can hold down on the Radar to make the Camera also lock on that object. There is also a supplementary button camera control on the bottom of the screen.
This is also the only view available in the Playstation Game.
Shoulder View
Shoulder View is a "2nd Person" camera mode where you can follow behind a Rock Raider or Vehicle in an "over-the-shoulder" perspective. The cavern appears noticeably different in this mode, as the ceiling is now rendered, as well as high-poly models and cavern fog. Rather than observing in a passive stance, the player takes control of the Cadet or Vehicle he is following and can control them using the arrow keys. You cannot perform any operations however, besides walking up against a drillable Wall to start mining it (assuming you have the proper drilling equipment to do so).
Eye View
Eye View, similar to Shoulder View, allows you to take control of a Rock Raider or Vehicle using the arrow keys, but instead from the perspective of what the Rock Raider sees. The cavern is also rendered with fog, ceiling and high-poly models in this camera mode, and you can perform the same actions you can in Shoulder View.
File
The Camera is placed in a map like other Objects in the OL file.
Priorities
Priorities organize various tasks that Rock Raiders perform in order of importance. The list can be reorganized to the players liking, and some tasks can even be disabled. Rock Raiders are known to ignore the priorities list, only when under a stressed state, usually do to being separated from the main group. Each Level has a default setup for the Priorities, and when you press the "R" reset button, it resets to that default.
List of Priorities
- Recharge Energy Crystals - Importance of Recharging Energy Crystals
- Use Vehicle - Importance of Entering Vehicles
- Construction - Importance of Picking Up Construction Barriers and transporting Materials to construction site.
- Clear Rubble - Importance of Shoveling Rubble
- Collect Energy Crystals - Importance of Picking up Energy Crystals
- Collect Ore - Importance of Picking up Ore and Building Studs
- Drilling - Importance of Drilling Walls and using Dynamite
- Reinforce Walls - Importance of Hammering Reinforced Walls
- Building Repairs - Importance of Repairing Buildings with the Spanner
- Train Rock Raider - Importance of Training Rock Raiders (This priority is unused in most of the game)
Defense
There are many forms of Defense against Threats ranging from Environmental Threats to Enemies.
Defending Rock Raider HQ and mining operations is essential for progressing through the PC Game as well as the Playstation Game. Almost all the threats have a unique way to defend them, however there are certain tools and other resources to help you to do so. These include:
- Weapons, which include an arsenal of Beam Guns and the Sonic Blaster.
- Action Stations, which sets all the Rock Raiders equipped with weapons on their gaurd.
- Electric Fences, which keep the Monsters out.
- Reinforced Walls, which hold off Land Slides & Cave-Ins as well as emerging Monsters.
- Power Paths, which in addition to powering Buildings serve as an effective defense against Eroding Lava.
- Support Station, which not only allows for the teleporting of more Rock Raiders and Vehicles but also fights against Depleting Oxygen Supplies.
- Mining Lasers, although they can accidentally damage vehicles and Rock Raiders, also do heavy damage to Monsters (at the expense of draining Energy Crystals!)
Radar
The Radar (also known as GeoScanner) is a device that maps out the surrounding geology of the level. This rather helpful tool helps Rock Raiders get a quick idea of the level's layout. The default Radar does not scan beyond the exposed terrain. However, if a Geological Center is built, or if a Vehicle is upgraded to have a Scanning Radar, the Radar can scope out unexposed terrain, including Hidden Caverns. The Radar screen has two settings: the Target Screen, and the Main Screen.
Target Radar Screen
The Target Radar Screen, which the Radar is set to by default, targets a specific object. This can be a Building, Vehicle, Material, Rock Raider, or Enemy. The Target Screen will follow the selected object in a close-up view.
Main Radar Screen
The Main Radar Screen shows the geology of the map, marking all specific terrain types and objects to a specific colored square or dot. A large arrow with a square surrounding it shows the location and visual scope of the Camera. Scanning Radars appear as dotted, fluctuating circles.
Running Modes
The Rock Raiders PC Game has many different Running Modes, which run the game with different settings.
They are typically activated either in the game's shortcut via executable Parameters or in the Lego.cfg file. The default running mode for the game is 32-Bit Enhanced Fullscreen (using the "Enhanced" Shortcut) or 32-Bit Standard Fullscreen (using the "Standard" Shortcut).
There are eight main running modes and four different types of running modes:
Bit Depth Running Modes
These choose the Bit Depth that the game runs in.
16-Bit Mode will run the game in 16-Bit color rather than in 32-Bit. This allows for Windowed Mode. It can be activated simply by changing your computer's display properties to 16-Bit.
32-Bit Mode will run the game in 32-Bit color rather than in 16-Bit. It can be activated simply by changing your computer's display properties to 32-Bit, if your computer is capable of doing so. You cannot run the game in Windowed Mode while in 32-Bit Mode.
Graphics Modes
These choose the sophistication of graphics used when running the game.
Standard Mode is designed for less capable computers with only 32MB of RAM. Standard mode runs with the following command-line "-best -reducesamples -reduceanimation -reducepromeshes -reduceflics -reduceimages".
Enhanced Mode/Advanced is a visually optimized alternative to the Standard Mode. This is for more capable computers of 64MB+ RAM, and may be less stable than Standard Mode. By default a shortcut is already made that will start the game in enhanced mode, however, it can be activated by simply only adding -best to the Target in the Shortcut's properties.
Screen Modes
These choose whether the window will be in fullscreen or not.
Fullscreen Mode is a default Running Mode that runs the game in Fullscreen rather than in Windowed Mode. This mode can be activated in both 16-Bit Mode and in 32-Bit Mode (because it automatically switches the desktop to 16-bit colour). This mode is much more prone to crashing & freezing, because it becomes defunct if it loses focus (which happens if the user presses alt-tab to switch windows during play, or if some program pops up a blocking notification).
Windowed Mode runs the game in a reduced window rather than in Fullscreen. It is much easier and quicker to minimize while in Windowed Mode, which makes it ideal for testing purposes. It can only be run while in 16-Bit Mode. The fastest way to run windowed mode is to first switch your computer's display to 16-bit and then change or make a copy of the RR shortcut, changing -best to -windowed.
Developer Modes
These were used by the developers and are also applicable for Modding purposes.
Test Level Mode activates all the Levels at once, without having to complete any. This is especially useful for modding purposes. It can be activated by adding -testlevels to the Target in the shortcut's properties. Because of its nature, it is regarded as one of the games only real "cheats."
- See Main Article: Debug Keys
Debug Key Mode activates a set of short-cut keys that can make various changes to the game while in-game. They are activated by adding -debug to the Target in the shortcut's properties.
Troubleshooting Modes
These were put in place for the purpose of troubleshooting, if users were having problems running the game.
FTM Mode allows the game to use all the available texture memory in the player's video card. Since the game was designed around a strict set of memory pools, running the game in this mode can be buggy. It was intended to be used to fix certain crash problems after start-up. It can be activated by adding -ftm to the Target in the shortcut's properties.
FVF Mode can be used to solve over-fogging issues on older video cards. It can be activated by adding -fvf to the Target in the shortcut's properties.
The animations seen during the rewards screen can be disabled by adding -reward to the Target in the shortcut's properties.
Voodoo2 based video cards that are having trouble running the game can have texture management disabled by adding -nomanagement to the Target in the shortcut's properties
All sounds (except sounds present in the videos/Cut Scenes) can be disabled by adding -nosound to the Target in the shortcut's properties. This can fix bugs occurring around certain sounds and the game's soundtrack, if files are corrupted or there is an incompatibility with the user's sound card.
Rock Raiders HQ
(If you are looking for the Lego Set, go Here)
Rock Raiders Headquarters refers the base of all activities in a mission. This is typically the location of most Buildings, primarily the Tool Store, Teleport Pad, Power Station, and Support Station.
In your missions, you will come across numerous challenges, all require a well placed and thought out base.
There are many ways to build a base. One partiularly good option for base structure is Resilent. A base with this structure can have all of its Power Paths removed with little to no loss of fuction. Sattlite consists of one main base and one or more sattlite bases with their own Power Stations. Ad-hoc consists of many small bases with their own Power Stations.
Your Headquarters should be well protected against any Enemies. The first step in doing so would be to surround the base with Electric Fence, which should make it safe from any Monsters. Nonetheless, it is also good to have a team of Rock Raiders equipped with the necessary Weapons to defend HQ with. Note that while fences may protect your HQ from monsters, Slimy Slugs can still get through, so keep an eye on any nearby holes.
It is also important to keep your base safe from any nearby eroding lava, which could destroy your entire base, if left unchecked. This can be done by simply placing power paths along side the lava's edge. These paths will require constant maintenance from the eroding lava. Paths that are powered (connected to the power station and glowing aqua blue) will last longer than those that are not.
It is important to place your HQ in a proper location, and with efficiency. If your base is close to eroding lava, it is usually suggested to move it to another safer location. Some missions include this as part of the objective. Large flat areas that are easily accessible (meaning that it can access most of the areas of the map without having to cross lava or water) are usually good areas for placement. It is also a good idea to conserve space. The more power paths you have to build, the more Ore you use up.
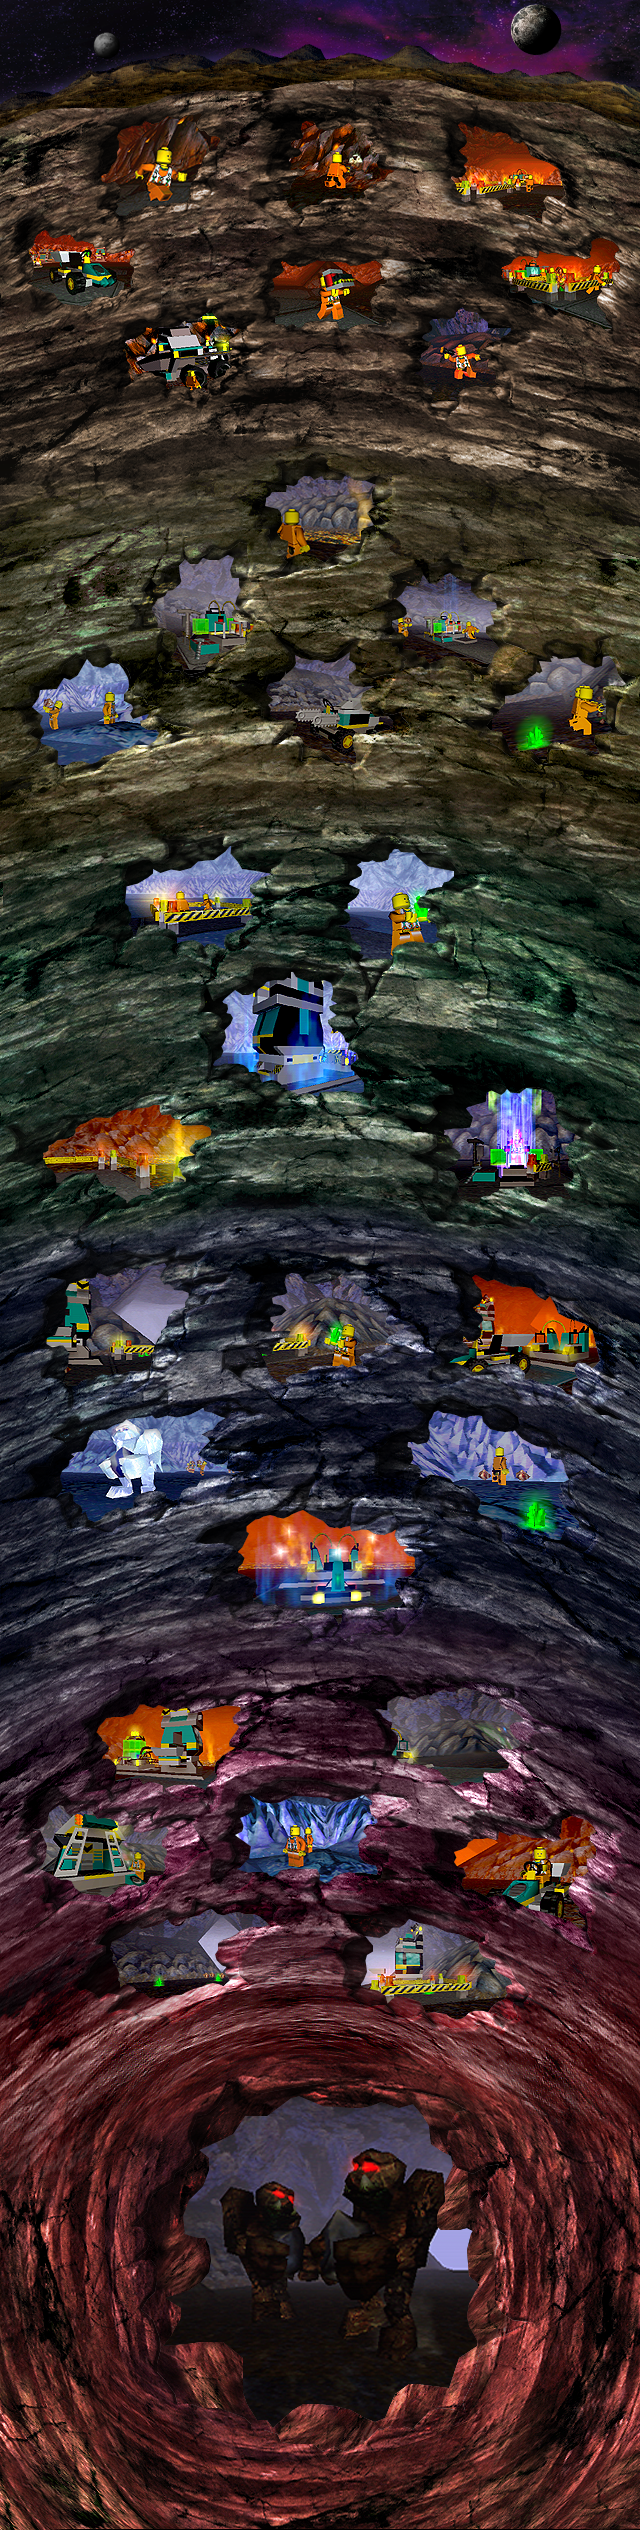
Terrain
Terrain is a classification of caverns based on environment featured in both the PC Game and the Playstation Games. In addition to differences in environment they are also often characterized by different Threats, particularly the three Monster Types.
Cavern Types
There are three basic Cavern Types:
- Rocky Terrain, which is characterized by abundances of Rock and Dirt and is also the most common and hospitable.
- Icy Terrain, which is characterized by abundances of Ice and Energy Crystals, and is often associated with depleting Oxygen Supply. It is the least hospitable.
- Molten Terrain, which is characterized by abundances of molten rock and Lava (often Eroding Lava).
Surface Types
There are many different Surface Types that one would encounter in each cavern type. These can be categorized as either being Wall Types or Ground Types. The cavern's Ceiling could also be considered a surface type, but it generally cannot be interacted with for mining purposes. Wall types differ in thickness and difficulty to drill, ranging from Dirt, the easiest of the walls to drill, to Solid Rock, which is impenetrable. There are also more rare wall types known as Seams which include an abundance of a resource such as Ore and Energy Crystals. Ground Types differ in what types of Objects are able to cross them. For example Rock Raiders can only traverse Ground, Rapid Riders can only traverse Water, and the Tunnel Scout can traverse Lava as well as Ground and Water. There are also more specialized ground types with special properties such as Rubble and Slimy Slug Holes.
While Rockwhales enjoy swimming in lava, they are not usually found in these environments.
Action Stations
Action Stations is a mode in LEGO Rock Raiders that can be activated in-game.
It is a Defensive mode that puts Rock Raiders on the alert. Once activated, any Rock Raiders that are carrying a Laser Beam, Freezer Beam, or Pusher Beam will drop what they are doing and attack any Monsters or Slimy Slugs in the viewable map. They are also no longer afraid of other Enemies, such as Bats. Once all the enemies they can attack are gone, the Rock Raiders will do nothing until Action Stations has been turned off. Once it has been deactivated, the Rock Raiders will go back to their work. This mode has no effect on Rock Raiders that aren't carrying a Beam Gun of some sort. While Action Stations are typically turned on manually, they will automatically turn on whenever Buildings are damaged.
Power Sliding
Power Sliding is a turning technique in the first LEGO Racers game.
Description
Power Sliding is a racing technique that only players can use (though computer-based racers can make sharp turns, depending on how their path is mapped) in order to make tighter turns. When the player power slides, black skid marks appear on the ground for a short amount of time. There are two types of power sliding:
Basic Power Sliding
The typical Power Slide can be achieved by holding down the Power Slide key (Spacebar by default), and turning at the same time, the player can swerve around tight corners with easy. However, while Power Sliding, it is much harder to control handling, as the player is locked into turning at one angle. If the player doesn't pull out of Power Sliding fast enough they will ram themselves into a wall. However, mastery of this technique, while not necessary, is a very useful skill to have while progressing through the game.
Super Sliding
Super Sliding is a more advanced form of Power Sliding which requires the player to hold down both the Power Slide, accelerate, and brake buttons simultaneously while turning. This will achieve an extremely fast and sharp turn to make even the toughest corners in the game. But just as with normal Power Sliding, if the player does not time it right, they can end up smashing themselves into a wall or even end up turning around in the wrong direction.
Power Ups
Power ups are a feature of the first LEGO Racers game. They are special powers, or attacks, that the player or computer-based racers of the game can pick up to give themselves an edge on the race against their opponents.
Power-Ups are scattered about every single Race Track in the game and utilizing them is key to progressing through the game. Each Champion in the game is proficient with one or more of these power-ups, and will often focus on a particular type of power-up, which the player will have to learn to counter in order to defeat them. The Power-Ups themselves come in the form of colored bricks when seen on the track, revealing the particular power-up when picked up. Unlike in other LEGO Racing games, and Mario Kart, these power-ups are not randomized.
The player can pick up only one Power-Up at a time, and if the player picks up another Power-Up brick, that brick will replace the one the player was carrying. The brick that the player was carrying is then dropped in the place of the one that they picked up. This can sometimes be used to the player's strategic advantage, as the computer-based players go along a predestined route, and will always pick up a particular power-up. The player can drive in front of another racer and replace the power-up that the computer-based racer is about to pick-up. Since there is a delay before the replaced brick reappears, the racer behind the player doesn't get to pick it up. If the player is further ahead, the computer-based racer will simply be "tricked" into picking up the replaced brick, which is a useful tactic against Champions, to give them a less useful brick than the kind they are proficient in. Alternatively, if the player is in the middle of using a Power-Up, such as a shield, another Power-Up can be picked up and used simultaneously. However, if its of the same type, the 2nd power-up will over take the first.
There are five types of Power-Ups/Bricks, and sixteen unique power ups total:
Power plus brick
The power plus brick, while not a power up within itself, upgrades other bricks to higher level power ups. These bricks are one of the most important and least common in the game. They are often placed in hard-to-reach locations and in short-cuts. The more White Bricks are collected, the stronger the Power-Ups are when used. You can collect up to three White Bricks at a time (in all versions of the game but the Game Boy version, where you can only pick up one). Once three are collected, the player will simply drive over any extra white bricks on the track; they do not disappear until the equipped Power-Up is used.
Red brick
The red brick can be collected to obtain a projectile type power up. Captain Redbeard and Johnny Thunder primarily use red bricks, the latter only does so when one or more white bricks have been collected.
The four power ups that can be collected from this type of brick are:
| Icon | Name | Level (# of White Bricks) | Description |
|---|---|---|---|
| File:CannonBall.png | Cannon Ball | 0 White Bricks | Shoots a cannon ball at an opponent ahead of the user, briefly knocking the opponent to the air and slowing them down. The cannon ball auto-targets slightly, so aim is rarely necessary, however it has a limited range. |
| File:GrapplingHook.png | Grappling Hook | 1 White Brick | Fires a grappling hook that attaches to an opponent ahead of the user, pulling them back and pulling the player forward. This also auto-targets but can be broken if stretched around a wall or the opponent runs to far ahead of them (perhaps after using a Boost). |
| File:LightningWand.png | Lightning Wand | 2 White Bricks | Fires a powerful arc of electricity that zaps other racers, disabling them briefly in the same fashion as the cannon ball. This power-up can strike any number of opponents, and lasts for about 10 seconds. |
| File:3GuidedMissiles.png | 3 Guided Seeking Missiles | 3 White Bricks | Shoots three powerful missiles which will rocket across the whole map until they find a target, disabling an opponent for a slightly longer period of time than the Cannon Ball or Magic Wand, sending the victim spinning in the air for a few seconds. They will eventually run out of fuel and crash into the ground if they do not find a target in time, and occasionally will crash into a wall around tight turns. They can only be fired forward. |
Blue brick
The blue brick can be collected to obtain a shield type Power-Up. King Kahuka and Baron von Barron primarily use blue bricks, the latter only does so when one or more white bricks have been collected.
The four Power-Ups that can be collected from this type of brick are:
| Icon | Name | Level (# of White Bricks) | Description |
|---|---|---|---|
| File:BlueShield.png | Blue Shield | 0 White Bricks | Activates a blue colored shield that absorbs all incoming attacks for five seconds. |
| File:GreenShield.png | Green Shield | 1 White Brick | Activates a green colored shield that absorbs all incoming attacks for six seconds. |
| File:YellowShield.png | Blue Shield | 2 White Bricks | Activates a powerful yellow shield that absorbs and reflects all incoming attacks back at opponents for eight seconds. Any car that bumps into the shielded racer will get spun out for a couple seconds as if they had gone over an Oil Slick. |
| File:RedShield.png | Heat-Seeking Missiles | 3 White Bricks | Activates a powerful red shield that absorbs and reflects all incoming attacks back at opponents for ten seconds. Any car that bumps into the shielded racer will get spun out for a couple seconds as if they had gone over an Oil Slick. |
Yellow brick
The Yellow Brick can be collected to obtain a hazard type Power-Up. Basil The Batlord and Gypsy Moth are proficient in this power-up as well as all the other power-ups, the latter is particularly proficient in collecting white bricks for more powerful attacks.
The four Power-Ups that can be collected from this type of brick are:
| Icon | Name | Level (# of White Bricks) | Description |
|---|---|---|---|
| File:OilSlick.png | Oil Slick | 0 White Bricks | Drops a puddle of oil behind the user, slipping up any racers that slide over it, spinning them out for a few seconds. |
| File:BarrelOfGunPowder.png | Barrel of Gun Powder | 1 White Brick | Tosses a lit barrel of gunpowder behind the user, knocking the victim into the air briefly much like the cannon ball, but aimed behind the user rather than in front. Like the cannon ball, it auto-targets slightly, so aim is rarely necessary, however it has a limited range. |
| File:MagneticTrap.png | Magnetic Trap | 2 White Bricks | Drops a tall forcefield-like magnetic trap that captures players and hold them in place for a few seconds. Racers can get knocked out of the trap before it disappears, but usually the racer that knocked the other out gets trapped. |
| File:MummyCurse.png | Mummy's Curse | 3 White Bricks | Leaves behind a region with wisps of green smoke and a floating mummy head that will curse any racer that passes through. This is one of the most devastating attacks in the game, as any racer affected by the curse moves at a much slower speed for around 10 seconds. If a player is affected, their screen will turn a greenish tint that warps in and out, and the turning controls are inversed (this does not affect the paths of the computer-based players). Also, any racer infected with the curse can pass it on to another racer by bumping into them, thus freeing themselves of the curse. This however, does not increase the duration of the curse. The curse even affects players that are boosting, and if placed correctly, can even catch a racer that is traveling through warp boost. |
Green brick
The Green Brick can be collected to obtain a speed boost type Power-Up. Green bricks are the most important out of all the typical power-up bricks, and are the least common after the white brick. Rocket Racer and Veronica Voltage both primarily use green bricks, the former will only use his power-up after collecting a full three white bricks.
| Icon | Name | Level (# of White Bricks) | Description |
|---|---|---|---|
| File:TurboBoost.png | Turbo Boost | 0 White Bricks | Activates a small rocket boost on the back of the car which speeds up the racer moderately for a couple of seconds. |
| File:ExtraBoost.png | Extra Turbo Boost | 1 White Brick | Activates a large green colored rocket boost on the back of the car, speeding up the racer considerably for a couple of seconds. |
| File:FlyingBoost.png | Flying Turbo Boost | 2 White Bricks | Activates two large blue colored rocket boosts on the back of the car, sending the racer flying at high speeds across the track for about 10 seconds. Although not affected by off-terrain portions of a race track while in flying turbo boost, handling can become more difficult, and Power Sliding becomes extremely effective. |
| File:WarpBoost.png | Warp Turbo Boost | 3 White Bricks | Activates a warp drive on the racer, which forms a small blue space-time bubble around the car sending the car warping through time and space to a point much further along the track in a short amount of time. This is one of the strongest power-ups in the game and is used excessively by Rocket Racer. There is a small bug where if you warp too close to a wall in some places, it may send you flying off-map for a couple seconds before being teleported back to the racetrack somewhere. |
LEGO Racers
LEGO Racers was a LEGO theme officially started in 2001, though racing themed sets can be traced back all the way to 1975.
The "LEGO Racers" title and logo was first used for the video game, which was first released in 1998 & 1999. The first official sets for the theme, using the first logo, started appearing in 2001 (along with the sequel to the first game as well as the Board Game), however the theme wasn't fully developed until 2002. In 2002, the unofficially titled Drome Racers theme was released set in a futuristic racing stadium called the "Drome." These sets however were mostly released just under the "LEGO Racers" title, along with other racing themed sets that didn't necessarily tie into the Drome Racers story-arc. Unlike most other themes, the racing theme spread to include both basic "System" sets and "Technic" sets. The theme has since expanded over the span of 10 years and continues to this day.
Sets & Sub-Themes
Between 1998 and 2011, a total of 10 Sub-Themes were released, including over 200 Lego Sets & Merchandise.
- Crash 'em Racers (aka "Xalax" Racers)
- Drome Racers
- Radio Control (aka "RC Racers")
- Power Racers
- Tiny Turbos
- Ferrari
- Lamborghini
- Williams F1
- Speed Racer
- Air Stompers
Video Games
Many different games have also been released under the "LEGO Racers" title, including three video games, a board game, a mobile phone game, and many flash games.
Other Media
The LEGO Racers theme has also appeared in other forms of media.
Racers 2
Dino Island is the second world you race at in LEGO Racers 2. This is the first time you race with the minor leaguers. Sam Sanister is the boss of this world, and he will give you his turbo powered engine for beating him because he no longer needs it.
Mars is the third world in LEGO Racers 2. The player races against the minor leaguers once again, and win four races on Mars to prove that he or she can drive well enough on Mars to take on the boss of the planet, Riegel in his mech. After you beat Riegel his gets angry and kicks his mech which causes his shield generator to fall out. He than leaves. Sparky tells you to take the shield generator before he gets back and "borrow" it and return it when your done. Mars is based off of the Life on Mars theme from 2001. In the story, a team of astronauts crashed on Mars and came face-to-face with the planet's natives.
The Arctic is the fourth world in LEGO Racers 2. This is the last world you will be racing against the minor leagues. After the players wins all four races against the minor leagues, he or she finds The Berg's cave and make him angry. The Berg then challenges you to a race. When the player beats The Berg, it gets sad because it won't be able to take on Rocket Racer. Due to the fact that the player upset The Berg, the player compliments The Berg on its great racing skills. This makes The Berg feel better. In return for making it feel better, The Berg goes into its cave and gets the player super wheels which it found and has no use for. The super wheels allows the player to have better grip with their vehicles. The Arctic is based off of the Arctic theme. A team of researchers traveled to the Arctic in search of the remnants of a meteor shower. They discovered meteorites with living fossils in them.
Rock Raiders levels
Below is a list of levels in LEGO Rock Raiders,
Windows
Tutorials
These levels appear in the normal Level Selection screen as well as the special Tutorial Levels screen.
- 1. Moving Rock Raiders
- 2. Rock Types And Drilling
- 3. Building Rock Raider HQ
- 4. Moving Rock Raider Vehicles
- 5. Using Explosives
- 6. Constructing Advanced Buildings
- 7. Drilling With Vehicles
- 8. Defending Rock Raider HQ
Levels
- Driller Night!
- The Path To Power
- Rubble Trouble!
- A Breath Of Fresh Air
- It's A Hold Up
- Explosive Action
- Search 'n' Rescue
- Breathless
- Frozen Frenzy
- Erode Works
- Water Lot Of Fun
- Water Works
- Rock Hard
- Don't Panic!
- Ice Spy
- Split Down The Middle
- Lava Laughter
- Oresome!
- Fire 'n' Water
- Run The Gauntlet
- Air Raiders
- Lake Of Fire
- Back To Basics
- Hot Stuff
- Rocky Horror
PlayStation PAL
These levels appear in the PAL Playstation game. Unlockable levels are unlocked by obtaining the equivalent amount of five bronze medals, one for each of the aforementioned missions. Silver Medals are worth two Bronze Medals, while Gold Medals are equivalent to three Bronze Medals.
Secret levels are unlocked by achieving Gold Medals on all missions in the appropriate layer. For example, achieving all Gold on the first layer will unlock the level Transport Crisis. Transport Crisis must be unlocked to gain access to this layer.
One Player
- Easy Pickings
- Water Ways
- Rescue Mission
- Ore-some!
- Blown Away
- Crystal Crazy (Unlockable)
- Hot Scoop!
- High Flyer
- Slug Lake
- Into the Spiders' Nest
- Rapid Rush
- Trapped! (Unlockable)
- Express Delivery
- Dozer Daze
- Smoke on the Water
- Ring of Fire
- The Maze
- The Last Stand (Unlockable)
- Transport Crisis (Secret)
- Whale Song (Secret)
- Hop To It! (Secret)
Two-Player
Note: Some specially-designed two-player missions have been created for this mode, but the majority of levels are one-player missions designed for two. Every sixth level does not need to be unlocked, but must be completed to access the next layer.
- Easy Pickings (2 Player)
- Air Racing
- Team work!
- Lava Jumps
- Rescue Mission (2 Player)
- Whale World
- Blown Away (2 Player)
- High Flyer (2 Player)
- Crystal Crazy (2 Player)
- Into the Spiders' Nest (2 Player)
- Water Ways (2 Player)
- Trapped! (2 Player)
- Formula 20,000
- Hot Scoop! (2 Player)
- Hop To It! (2 Player)
- Ring of Fire (2 Player)
- Ore-some! (2 Player)
- The Last Stand (2 Player)
PlayStation NTSC
These levels appear in the NTSC Playstation game. Unlockable levels are unlocked by obtaining the equivalent amount of five bronze medals, one for each of the aforementioned missions. Silver Medals are worth two Bronze Medals, while Gold Medals are equivalent to three Bronze Medals. Once the unlockable mission is won, a new layer is opened up.
One-Player
- Jet's Mission
- Axle's Mission
- Docs' Mission
- Bandit's Mission
- Sparks' Mission
- Trapped (Unlockable)
- Supply Base
- River Run
- Thawed Out
- Web Space
- Move On Up
- Hot Rocks (Unlockable)
- Fire Canyon
- Fire Down Below
- The Lair of the Rockwhale
- Trouble Down the Mine
- Scarce Resources
- Last Man Out (Unlockable)
Two-player game
Any levels with the success message congratulating Player 1/2 will have Bronze omitted and the Gold Medal awarded to whoever gets the most materials collected.
Game Files
The Game Files are the files that make up all the properties of the Rock Raiders PC Game and the Playstation Game. All these files are important to Modding the games.
There are many different kinds of game files. The most important for the PC Game are:
- The WAD files, which are the main two files that almost all the data is compacted into.
- The Lego.cfg file, which contains all the basic parameters of the game and organizes & recalls all the other data used in the game.
- The Level files, which control various aspects of a specific Level and the Objects it contains.
Other files include:
- The AE file, which coordinates the basic parameters of various Objects.
- The LWO and LWS files, which are the model and animation files for Objects among other things.
- BMP files, which are simple bitmap images that are the default file type used for the game's Textures.
- WAV files, which is the default audio file type used for the game's sounds, streams, etc.
- FLH files, a special type of animation file for "flicks," which are more or less moving images.
- IFO and TXT files, the default text file types used in the game (both can be edited in notepad).
- X and UV files, which sort out some parameters for model files.
- The PWP files are the main files used in the Playstation Game, much like the PC's WAD files.
Also see:
Hex Editing program
A Hex-Editing Program (a.k.a. byte editor) is a type of computer program that allows a user to manipulate encrypted files (normally non-plain text) like NPL files. This type of program is essential to Programming Mission Objectives. There are many great hex-editing programs out there. One good example would be XVI32.
Since most encrypted files in the game are in Hexadecimal computer language, they can be rather difficult to read. The computer language translates readable script into so called hex-strings which are 4 character pairs that designate a Number, Symbol, or Parameter from the script.
Most Hex-editing is done by editing pre-existing files, rather than creating new ones from scratch, which requires an encrypting program that the game would be compatible with, which is currently not at our disposal. Editing an encrypted file simply comprises of searching for a string (most programs have a "Find" or Ctrl+F function) that you want to modify, change the characters appropriately, and then save the file (make sure that you have a back-up of the original files somewhere before doing so).
Level files
Level files contain all the information relating to specific Levels for purposes of Game Modification. They are located in LegoRR0/Levels. By default, the main missions are located in the GameLevels folder, and tutorial missions in the TutorialLevels folder. Unused Levels that were made during the game's development are located in the TestLevels folder, which use a primitive system that is no longer compatible with the game. Inside each of these folders are the level pictures and a folder for each Level that contains all the files relating to that level.
Aside from the level pictures, there many different kinds of Level files:
Editing these files is the key to modifying and creating levels for Lego Rock Raiders.
Unused Level Files
There are also three unused level file formats:
The BLK and LEV files can be found in the three test levels that were made in the early Rock Raiders Beta. The BLX files can be found in the base mission folders, often paired with the MAP
WIP templates
better collapsible stuff
something?
class="collapsible collapsed infobox " style="background-color: #f9f9f9; border: 1px solid #aaa; font-size: 90%; margin: 1em auto; padding: 2px; text-align: center; width: 60%; "
Level names
Czech
(=á (D9?))(}=č)(ƒ=é)({=ě)(‚=í)(‰=ň)(„=ó)(~=ř)(|=š)(ˆ=ť)(†=ů)(€=ý)(?=ž (7F))(Ž is the same)
- 1. Pohyb s kameňáky
- 2. Typy kamenů a vrtání
- 3. Výstavba základny kameňáků
- 4. Pohyb s vozidly kameňáků
- 5. Použití výbušnin
- 6. Stavba složitějších budov
- 7. Těžba s vozidly
- 8. Obrana základny
- Noc vrtáků!
- Cesta k energii
- Zatracená suť!
- Závan čerstvého vzduchu
- To je zdržení
- Třaskavá akce
- Najdi a zachraň
- Bez dechu
- Zmrazený vztek
- Síla eroze
- Vodní hrátky
- Vodní dílo
- Kámen natvrdo
- Nepropadejte panice!
- Ledový špión
- Puklina uprostřed
- Výsměch lávy
- Rudná žíla!
- Oheň a voda
- Tvrdá zkouška
- Přepadení ze vzduchu
Danish
- 1. Sådan flyttes Rock Raiders
- 2. Klippetyper og boring
- 3. Bygning af Rock Raider hovedkvarteret
- 4. Sådan flyttes Rock Raider køretøjer
- 5. Brug af sprængstoffer
- 6. Konstruktion af avancerede bygninger
- 7. Boring med køretøjer
- 8. Forsvar af Rock Raider hovedkvarteret
- Boring i mørket!
- Strøm på linien
- Sagde du stenbrokker?
- Et pust af frisk luft
- Det er et røveri
- Eksplosiv aktion
- Søg og red
- Åndeløs
- Det frysende vanvid
- Nedbrudt?
- Vandvittigt morsomt
- Vandværker
- Hård rock
- Ingen panik!
- Isspionen
- Delt i midten
- Lavalatter
- Malmtraktering!
- Gennem ild og vand
- Løb spidsrod
- Luft Raiders!
Dutch
- 1. Rock Raiders verplaatsen
- 2. Rotssoorten en boren
- 3. Underground Basisstation bouwen
- 4. Rock Raider voertuigen verplaatsen
- 5. Gebruik van explosieven
- 6. Bouwen van uitgebreide gebouwen
- 7. Boren met voertuigen
- 8. Verdedigen van het Underground Basisstation
- Een boorfestijn
- Levensader
- Puinhoop
- Een luchtje scheppen
- Het kaartenhuis
- Vuurwerk
- Redder in de nood
- Ademnood
- Een koele ontvangst
- Afbraak in uitvoering
- Lekker in het water
- Hoog water
- Muurvast
- Geen paniek!
- Een ijzig avontuur
- De totale ineenstorting
- Lachen met lava
- Het hek van de dam
- Water en vuur
- Labyrinth
- Benauwd!
French
- 1. Déplacer les Rock Raiders
- 2. Types de roches et Forage
- 3. Construire un QG Rock Raiders
- 4. Déplacer les véhicules Rock Raiders
- 5. Utiliser la dynamite
- 6. Construire des installations élaborées
- 7. Forer à l'aide de véhicules
- 8. Défendre le QG des Rock Raiders
- La nuit du Foreur
- En route vers le pouvoir
- Combles et Décombres !
- Un souffle d'air frais
- C'est un Hold-up !
- Action explosive
- Recherches
- A bout de souffle
- Folie froide
- L'érosion des jours
- Tous à l'eau !
- Folie aquatique
- Hard rock
- Du calme !
- L'espion venu du froid
- L'empire du milieu
- Lave qui peut !
- Eurêka !
- A feu et à eau
- Attention : Rafales !
- Les Raiders de l'air
German
({=Ä)(‚=ä)(«=ü)(Ã=ß)
- 1. Bewegung der Rock Raiders
- 2. Gesteinsarten und Abbau
- 3. Bau des Rock Raider Headquarters
- 4. Bewegung der Rock Raider-Fahrzeuge
- 5. Sprengstoff einsetzen
- 6. Bau von fortgeschrittenen Gebäuden
- 7. Abbau mit Minenfahrzeugen
- 8. Verteidigung des Rock Raider Headquarters
- Die Stunde der Bohrer
- Saft für die Basis
- Ärger mit Abraum!
- Ein wenig frische Luft
- Verstärkung unterwegs
- Explosive Action
- Rettungskommando
- Atemlos
- Frosteinbruch
- Wer mag Magma?
- Jede Menge Wasserspaß
- Wasser-Werk
- Felsenfest
- Keine Panik!
- Eisspion
- Ab durch die Mitte
- Magma-Mutprobe
- Steinreich!
- Feuer und Wasser
- Spießrutenlauf
- Luftversorgung
Hebrew
| Config | Hebrew | Config | Hebrew | Config | Hebrew |
|---|---|---|---|---|---|
| a | א | j | י | r | ע |
| b | ב | ^ | ך | s | ף |
| c | ג | k | כ | t | פ |
| d | ד | l | ל | u | ץ |
| e | ה | m | ם | v | צ |
| f | ו | n | מ | w | ק |
| g | ז | o | ן | x | ר |
| h | ח | p | נ | y | ש |
| i | ט | q | ס | z | ת |
- הזזת פולשי הסלעים
- סוגי סלעים וקידוח
- בניית מפקדת פולשי הסלעים
- הזזת כלי רכב של פולשי סלעים
- שימוש בחומר נפץ
- בניית בנינים מתקדמים
- קידוח בעזרת כלי רכב
- הגנה על מפקדת פולשי הסלעים
- ליל הקידוח
- הדרך אל הכוח
- צרות בצרורות
- משב אויר צח
- המלכודת
- פעולה מפוצצת
- חפשו והצילו
- עוצר נשימה
- טירוף קפוא
- עבודות סחף
- שעשועי מים
- עבודות מים
- סלע קשה
- בלי פחד
- מרגל הקרח
- חצויים וחלוקים
- לבה מבעבעת
- מצבים במחצבים
- באש ובמים
- הרימו את הכפפה
- פולשים מן האויר
Italian
(…=à)(Œ=È)(‘=é)(›=ì)(¤=ò)(=ù)
- 1. Il movimento dei Rock Raiders
- 2. Tipi di roccia e trivellazione
- 3. La costruzione della base sotterranea
- 4. Il movimento dei veicoli dei Rock Raiders
- 5. L'uso degli esplosivi
- 6. La costruzione delle strutture avanzate
- 7. La trivellazione con i veicoli
- 8. La difesa della base sotterranea
- Cuor di trivella!
- Il cammino del potere
- Macerie deleterie!
- Una boccata d'aria
- Tutto in bilico
- Azione esplosiva
- Chi cerca trova
- Senza fiato
- Festa del ghiaccio
- Lavori erosivi
- Sotto il segno dell'acqua
- Lavori bagnati
- Rock pesante
- Niente panico!
- Spia dei ghiacci
- Spacca il mezzo
- Risata magmatica
- Mineraleggiante!
- Acqua & fuoco
- Accetta la sfida
- Predatori dell'aria perduta!
Japanese
- 1.ロックレイダーを動かそう
- 2.岩の種類とけずり方
- 3.ロックレイダー基地を建てよう
- 4.ロックレイダーのマシンを動かそう
- 5.ダイナマイトを使おう
- 6.むずかしい建物を建てよう
- 7.マシンでドリルを使おう
- 8.ロックレイダー基地を守ろう
- 岩ばんをけずれ!
- パワーを送れ!
- 岩石を運びだせ!
- 酸素がたりない
- 危険などうくつ
- 硬い岩をくずせ!
- 消えた仲間をさがせ!
- 閉じこめられたロックレイダー
- 氷のモンスター
- マグマから基地を守れ!
- 川岸の基地を救え!
- 流されたロックレイダー
- 小さなどうくつ
- マグマに負けるな
- 眠れる氷のモンスター
- チームの危機を救え!
- よう岩モンスターの
- こう石がいっぱい
- 火と水の戦い
- いくつもの試練
- 基地を建てなおせ!
Korean
- 야간 드릴러
- 전력선로
- 잡석문제
- 신선한 공기
- 침착
- 활동적인 액션
- 탐색과 복구
- 숨가쁜
- 가라앉은 격앙
- 침식작업
- 물
- 수작업들
- 단단한바위
- 허둥대지 말아요
- 얼음 스파이
- 갈라지다
- 용암 소리
- 광석
- 불과물
- 고난을 당하다
- 비행 대원들
Norwegian
(ƒ=å)(¶=ø)
- 1. Flytte Rock Raiderne
- 2. Bergarter og boring
- 3. Bygge en underjordisk base
- 4. Flytte Rock Raider-maskinene
- 5. Bruke sprengstoff
- 6. Bygge avanserte bygninger
- 7. Bore med maskiner
- 8. Forsvare den underjordiske basen
- I nattens malm og mørke
- En kraftanstrengelse
- Steintøffe saker!
- Skaffe pusterom
- Overfall
- Eksplosive saker
- Redningsaksjon
- Heseblesende action
- På tynn is
- Gravalvor
- Vannvittig moro
- Vannverk
- Steinhardt
- Mist ikke fatningen!
- Iskald beregning
- Delt på midten
- Lavalatter
- Malmplassert!
- Ild og vann
- Spissrotgang
- Luftangrep!
Polish
(ˆ=ą)(”=ę)(·=Ł)(¸=ł)(Ê=ń)(£=ó)(Á=Ś)(Â=ś)(¿=ź)(À=ż)
- 1. Przemieszczanie łamaczy skał.
- 2. Typy skał i świdrowanie.
- 3. Budowa bazy łamaczy skał.
- 4. Korzystanie z pojazdów łamaczy skał.
- 5. Używanie materiałów wybuchowych.
- 6. Konstruowanie budynków specjalnych.
- 7. Kruszenie skał przy pomocy pojazdów.
- 8. Obrona bazy łamaczy skał.
- Nocne świdrowanie!
- Ścieżka mocy.
- Rumowisko.
- Powietrza!
- W potrzasku.
- Wybuchowa akcja.
- Odszukaj i uratuj.
- Z zapartym tchem.
- Mroźne szaleństwo.
- Erozja.
- Igraszki z wodą.
- Przez wodę.
- Głową w mur.
- Bez paniki!
- Szpieg na lodzie.
- Przez środek.
- Zabawa z lawą.
- Co z tą rudą?
- Woda i ogień.
- Podnieś rękawicę.
- Łamacze przestrzeni!
Russian
- 1. Управление движением геологов
- 2. Горные породы и их бурение
- 3. Строительство базы геологов
- 4. Управление машинами
- 5. Применение взрывов
- 6. Строительство более сложных сооружений
- 7. Бурение с использованием машин
- 8. Защита Базы геологов
- Ночь бурения
- Ключ к энергии
- Беда с этим щебнем!
- Глоток воздуха
- Укрепление стен
- Взрывные работы
- Поисковые работы
- В западне
- Ледяной ужас
- В плену лавы
- Водные развлечения
- Наводнение
- Каменная преграда
- Не поддавайся панике!
- Ледяной лазутчик
- Каменные клещи
- Смех из недр
- Включите свет!
- Огненная вода
- Пройти сквозь строй
- Охота за воздухом
Spanish
(„=á)(‘=é)(š=í)(£=ó)(¬=ú)
- 1. Movimiento de los Rock Raiders
- 2. Tipos de roca y perforación
- 3. Construcci
- 4. Movimiento de vehículos
- 5. Uso de explosivos
- 6. Construcción de edificios complejos
- 7. Perforación con vehículos
- 8. Defensa del cuartel general de los Rock Raiders
- Noche perforadora
- Un eléctrico salto a la red
- Cascotes por doquier
- Un soplo de aire fresco
- Arriba las manos
- Acción explosiva
- Búsqueda y rescate
- Sin aliento
- Horror helado
- Obras de erosión
- Chorros de diversión
- Actividades acuáticas
- Rocadura
- Ante todo, mucha calma
- El espía que surgi
- Justo por la mitad
- Risa de lava
- Mineralizado
- Agua y fuego
- Desacuerdo general
- Tropas aéreas
Swedish
(|=Å)(ƒ=å)(‚=ä)(=Ö (hex 9D))(¢=ö)
- 1. Förflyttning av Rock Raiders
- 2. Bergarter och borrning
- 3. Att bygga högkvarteret Rock Raiders HQ
- 4. Förflyttning av Rock Raider-farkoster
- 5. Att använda dynamit
- 6. Att uppföra avancerade byggnader
- 7. Att borra med farkoster
- 8. Att försvara högkvarteret Rock Raiders HQ
- Borra i mörker!
- Vägen till kraft
- Röjning på gång!
- En nypa frisk luft
- Se upp för ras
- Explosivt uppdrag
- Räddningsuppdrag
- Med andan i halsen
- Iskallt uppdrag
- Flytande fara
- Vattenvärld
- Översvämning
- Stentufft
- Ingen panik!
- Isvarning
- Delad på mitten
- Lavaflöde
- Malmrikedom
- Hett värre
- Labyrint
- Återuppbyggnad!
Undiscovered Cavern
Hidden or undiscovered caverns are caverns that have not yet been opened, usually hidden behind large lines of Loose Rock. They can be effectively found using the Radar and the Geological Center. The number of Hidden Caverns found contributes to your total percentage score at the end of each Level.
While finding and mining hidden caverns is usually beneficial, there are certain levels that contain caverns which the player will wish to avoid. An example would be the cavern filled with fast eroding lava in the mission Air Raiders, which can quickly envelop the whole tunnel if left unchecked.
There exist some hidden caverns in the game that are unreachable, but can be seen on the Radar. It is not known whether these were intentional or a mistake in the making of the level. They appear a reddish-brown under the Radar.
File
Areas of hidden and open cavern are designated in the Dugg.map file.
01 00 - Exposed Cavern
02 00 - Hidden Cavern
EMB file
The Emitter (EMB) File, handles emission of particles. Particles are used when driving on certain surfaces such as grass, water and dirt. This file is also linked with the EMIT.MDB file and the EMIT.TDB file.
File Location
MENUDATA\CIRCUIT3\CIR3-01.EMB
MENUDATA\SINGRACE\PST.EMB
GAMEDATA\TEST\TEST.EMB
GAMEDATA\COMMON\EMITTER.EMB
GAMEDATA\RACEC0R0\RACEC0R0.EMB
GAMEDATA\RACEC0R1\RACEC0R1.EMB
GAMEDATA\RACEC0R2\RACEC0R2.EMB
GAMEDATA\RACEC0R3\RACEC0R3.EMB
GAMEDATA\RACEC1R0\RACEC1R0.EMB
GAMEDATA\RACEC1R1\RACEC1R1.EMB
GAMEDATA\RACEC1R2\RACEC1R2.EMB
GAMEDATA\RACEC1R3\RACEC1R3.EMB
GAMEDATA\RACEC2R0\RACEC2R0.EMB
GAMEDATA\RACEC2R1\RACEC2R1.EMB
GAMEDATA\RACEC2R2\RACEC2R2.EMB
GAMEDATA\RACEC2R3\RACEC2R3.EMB
GAMEDATA\RACEC3R0\RACEC3R0.EMB
LRS file
The LEGO Racers Save (LRS) file contains data regarding game progress and custom built racers and their cars. The files using this extension are found in MENUDATA. There are however extension-less files of this type under the file name "LEGORac1" stored in the "Saves" folder to store the player's game save.
File Location
MENUDATA\DEFAULT.LRS
MENUDATA\QBUILD.LRS
MENUDATA\ENGLISH\QBUILD.LRS
MENUDATA\DUTCH\QBUILD.LRS
MENUDATA\FINNISH\QBUILD.LRS
MENUDATA\FRENCH\QBUILD.LRS
MENUDATA\GERMAN\QBUILD.LRS
MENUDATA\ITALIAN\QBUILD.LRS
MENUDATA\NORWEGI\QBUILD.LRS
MENUDATA\SPANISH\QBUILD.LRS
MENUDATA\SWEDISH\QBUILD.LRS
Format
No much is known about the format of this file yet.
Header Block Size: 1152 Bytes
Racer Block Size: 640 Bytes
Noviy Disk
Noviy Disk (Новый Диск) is a Russian video game publisher and distributor based in Moscow.